
用单片机设计微型电子琴
三江大学(南京210012)
王兵
摘要: 介绍了用单片机设计微型电子琴的方法。给出了电路、程序框图及程序。关键词:单片机,电子琴,程序单片机因其体积小、功能强、价格低廉而得到广泛应用。本文介绍用AT89C51单片机设计微型电子琴的方
Abstract:
Key words :
介绍了用单片机设计微型电子琴的方法。给出了电路、程序框图及程序。
关键词:单片机,电子琴,程序
单片机因其体积小、功能强、价格低廉而得到广泛应用。本文介绍用AT89C51单片机设计微型电子琴的方法,仅需AT89C51最小系统,扩展一组小键盘(这里以4×4键盘为例,可按需要扩展),再加一片LM386做音频小功放,输出到扬声器。电源可由三节5号电池提供。
乐音实际上是有固定周期的信号。我们可以用AT89C51的一个定时器(如T1)控制,在P3.4脚上输出方波周期信号,产生乐音。根据不同的按键,调节T1的溢出时间,可输出不同频率的乐音,这样就做出了一台微型电子琴。
每个乐音的音高(频率)是固定的,表1列出了一个8度以及其上下共16个音的音名、频率及定时器T1初值对照(设晶体频率为6MHz),供参考。


(3)定时器1中断服务程序框图见图3。

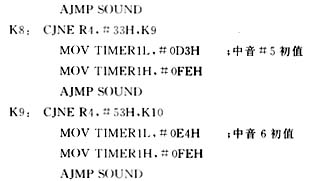
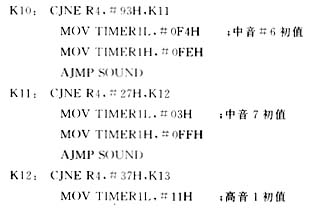
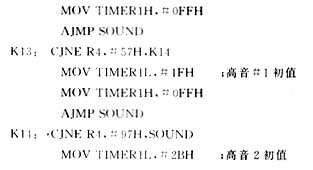
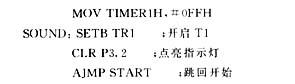
定时器1中断服务程序:

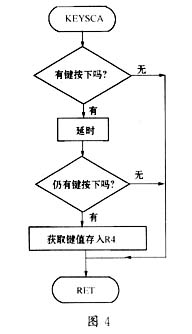
(4)键盘扫描程序框图如图4所示。
此内容为AET网站原创,未经授权禁止转载。